Below are the most commonly asked questions about this template. We recommend you to please go through the following questions before submitting any support request, may be you will find your problem already had an answer below:
How to set default layout?
If you have any confusion in changing the default layout, please go through this section Different Layouts to get your problem solved out.
How can I change the green loader?

We have used vue-loading-spinner module in the template, which provides a lot of predefined loading indicators. You can easily change the loading indicator in your template.
If you want to change the green loader, then please follow the steps given below:
Go to the src->container directory and open the selected layout that you are using in the app. In our case we have taken an example of Full.vue i.e. the default layout & implemented the “Google Spin”:
<template>
    <div class="app-default-layout">
 <template v-if="loading">
    <google></google> // add the component here
 </template>
 </div>
 ...
</template>

<script>
...
import { Google } from "vue-loading-spinner"; // import the selected loading indicator

export default {
  ...,
  components: {
    Google    // define your component
  }
}

</script>
The “vue-loading-spinner” have some differences in the names given on the sample website & in the actual usage. So for checking the samples follow the official website & for exact name sources do check their official GitHub repo.
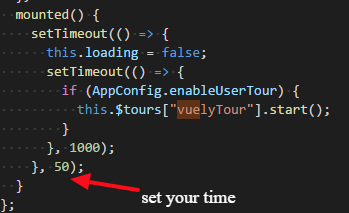
How can I change the amount of time that the green loader shows up?
Go to location src->container, open that layout file that you are using in your template and update the time of loader. Example: we are using the default layout.
How can I customize the green loader ?
Please follow the steps below to customize the green loader:
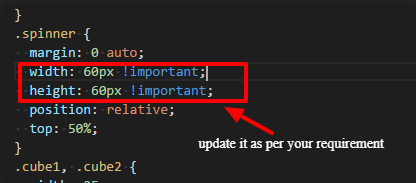
To change the width and height of the loader go to src->assets->scss->custom->_effect.scss and update its height, width according to your requirement as mentioned in given screenshot:
To change the color of the loader go to src->assets->scss->custom->_common.scss and replace the variable with your required color as defined in the screenshot below:
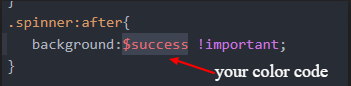
Note: If you want to assign the color to the $success variable then go to location src->assets->scss->_app.variables.scss and assign your required color code as given in the screenshot:

How to remove auth0?
Follow the instructions given below to remove auth0 from the template:-
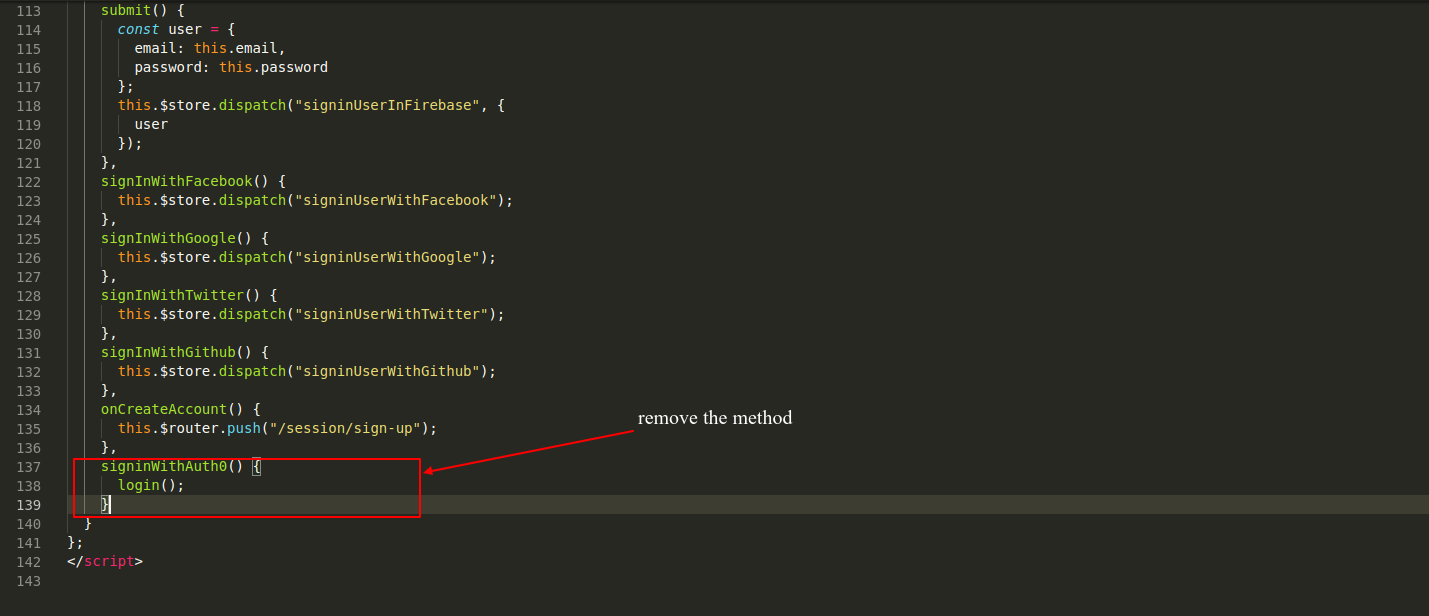
1. Go to src->views->session , open the LoginOne.vue file and remove the Signin With Auth0 button.
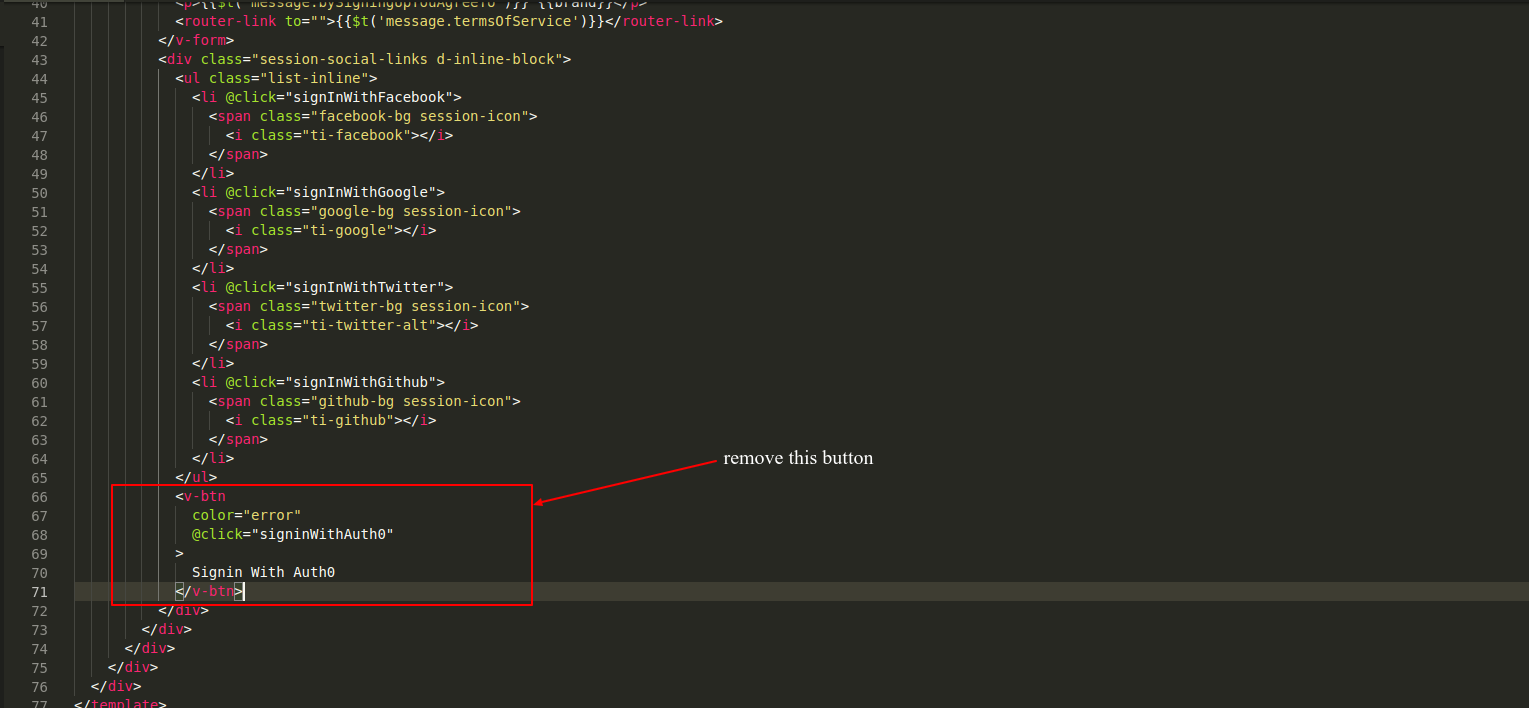
2. Also you need to remove it’s method from the same file as given in the screenshot.
3. Go to src folder and delete the auth directory.

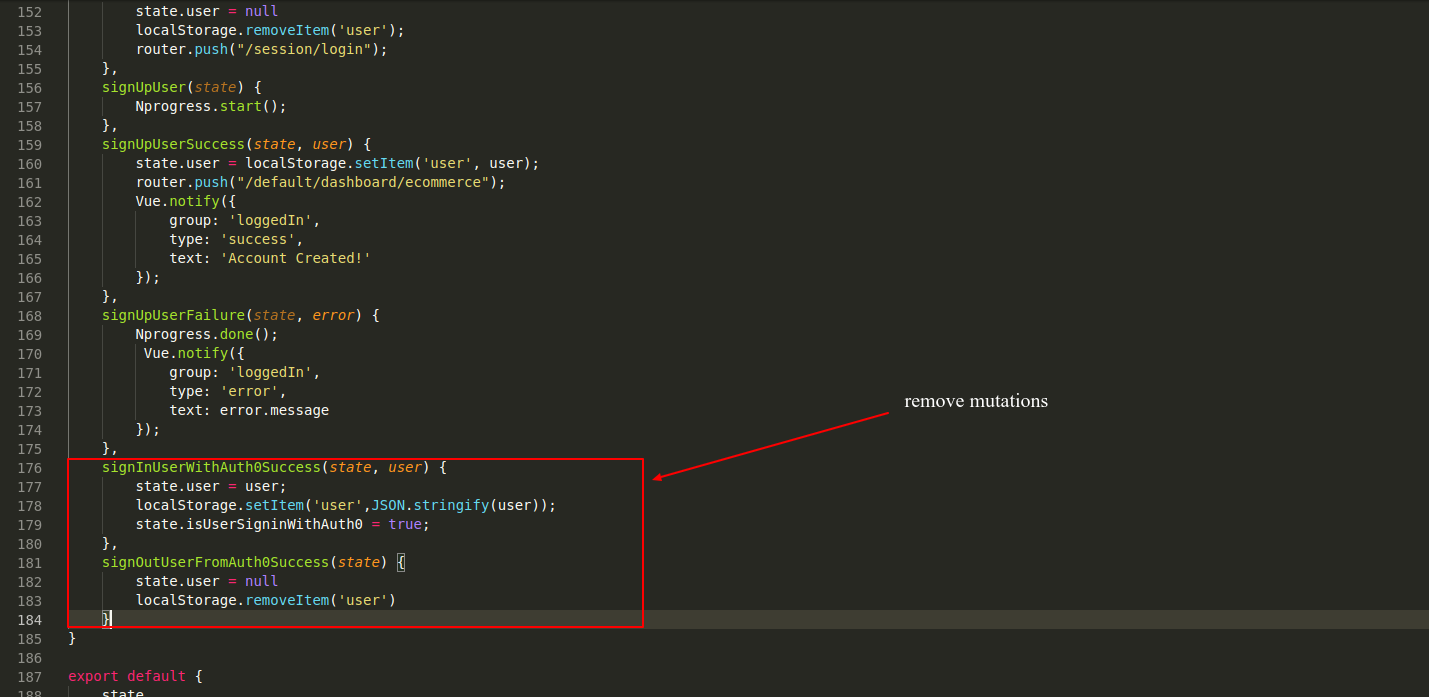
4. Go to src->store->modules->auth directory and open index.js file.

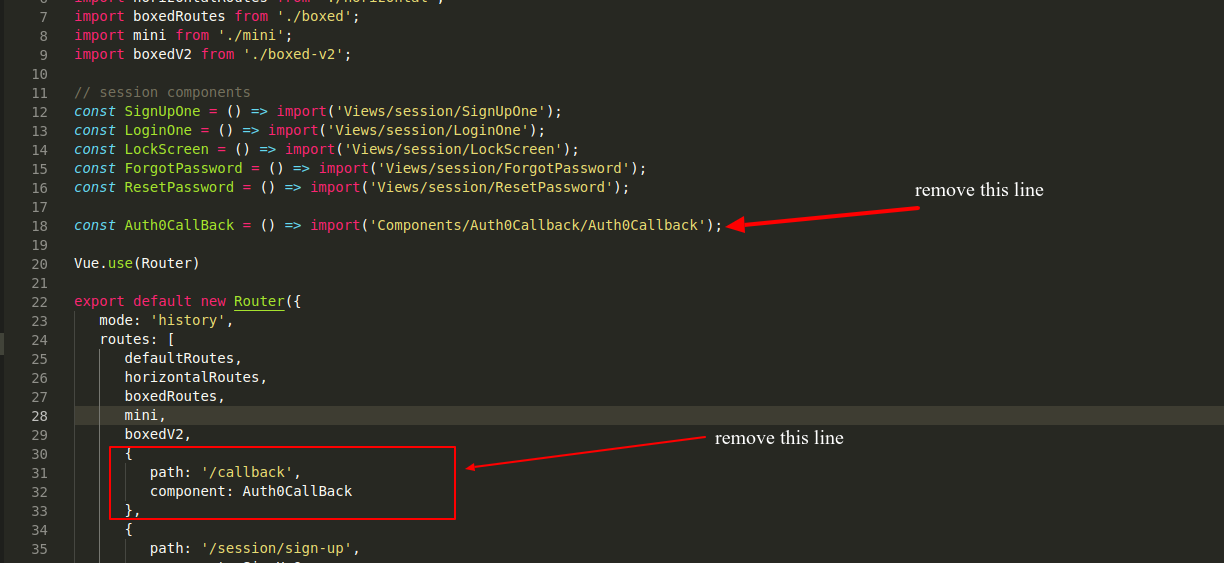
5. Go to src->router directory and open index.js file.
6. Now Open src->App.vue file and remove auth0 variables.
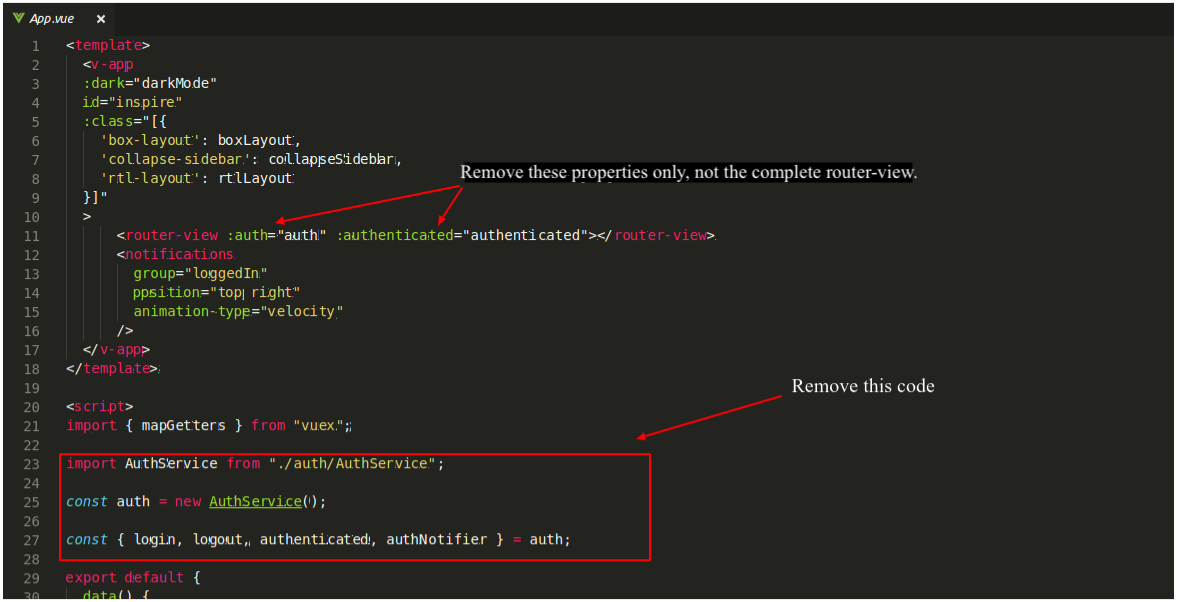
That’s it, this is all you need to do to remove the auth0.
How to enable user tour in development mode?
Tour by default works in production mode only. If you want to show it in development mode, then go to the src->constants and open AppConfig.js file and set the enableUserTour variable to true.
/**
 * App Config File
 */
export default {
 appLogo: '/static/img/site-logo.png',  // App Logo,
 darkLogo: '/static/img/site-dark-logo.png', // dark logo
 appLogo2: '/static/img/session.png',  // App Logo 2 For Login & Signup Page
 brand: 'Vuely',   // Brand Name
 copyrightText: 'Vuely © 2018 All Rights Reserved.',  // Copyright Text
 enableUserTour: true    // Enables the User Tour In Development Mode
}
How to run Production Build?
Follow the instructions given below to run dist (production build):
Install http-server globally in your machine
For window: run npm install -g http-server in the administrative privileges.
For macOS and Ubuntu: run sudo npm install -g http-server
Now go the project directory and run http-server ./dist
How to integrate Api’s in Vuely?
Vuely comes with Api’s ready means you can easily integrate api’s and connect with the backend server as well. Follow these steps to integrate api’s:
1.You can pass the api path as value for baseURL key in the vuely/src/api/index.js file:
import axios from 'axios';
export default
   axios.create({
      baseURL: 'https://vuely.theironnetwork.org/data/'
   });
2. Here is an example to integrate api. Open vuely/src/components/Widgets/TodoList.vue file:
<template>
  ...
</template>

<script>
...
import api from "Api";

export default {
   data() {
     toDoLists: null
   },
   mounted() {
      this.getTodos();
   },
   methods: {
       getTodos() {
          api
           .get("vuely/todo.js")
           .then(response => {
              this.toDoLists = response.data;
            })
            .catch(error => {
               console.log("error" + error
            );
         });
       }
       ...
   }
}
</script>
How to change the color of the template?
Here are step by step instructions to change the color on the template.
Case1: Change Theme’s
Please check the Themes section to get detailed information about changing the theme’s in the template.
Case2: Change Theme Color
Please check the Style Customization section to get knowledge about changing the theme color in the template.
How I can disable the FIREBASE?
Follow these instructions to disable the firebase:-
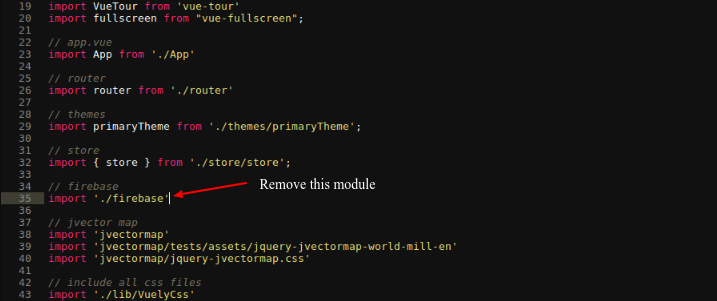
1). Remove the firebase from the src->main.js.
2). Go to src -> views -> session , open the LoginOne.vue file and remove these lines of code as mentioned in screenshots.
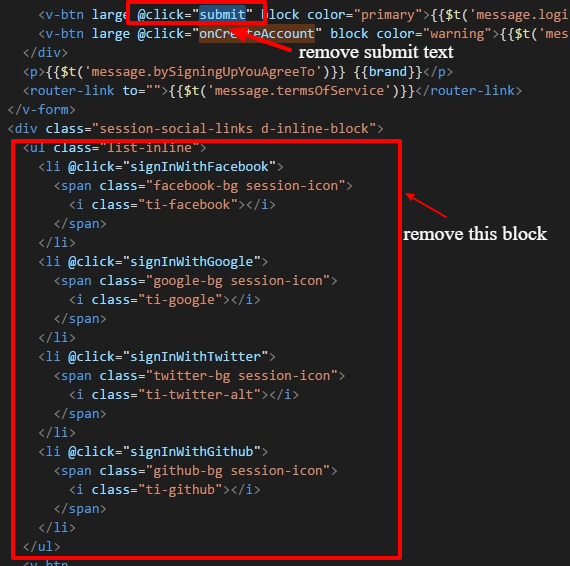

LoginOne.vue
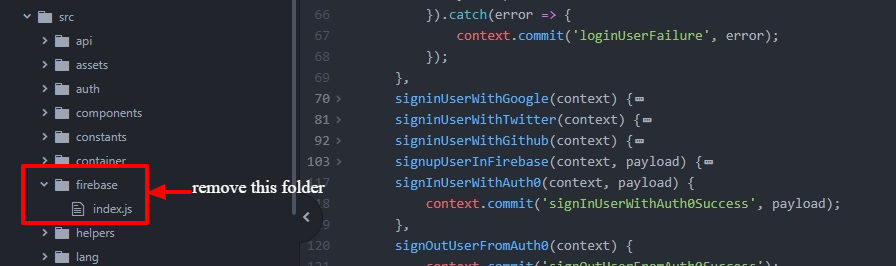
3). Remove firebase folder from the location src/firebase.
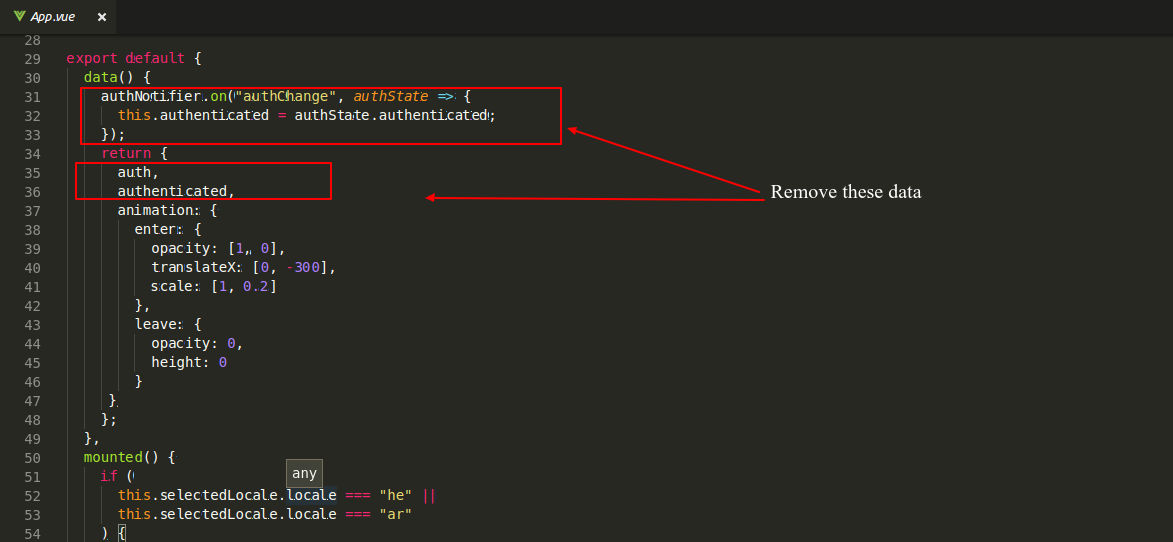
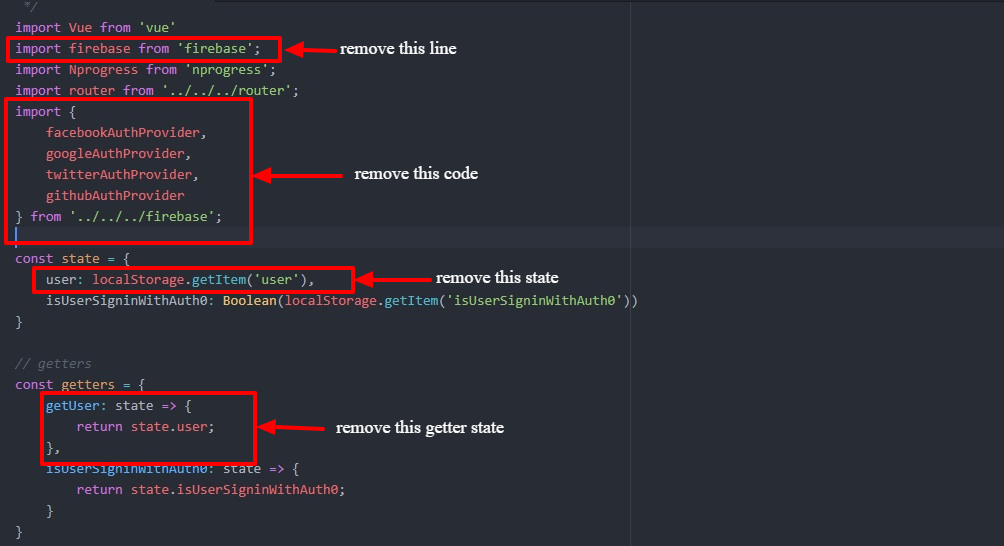
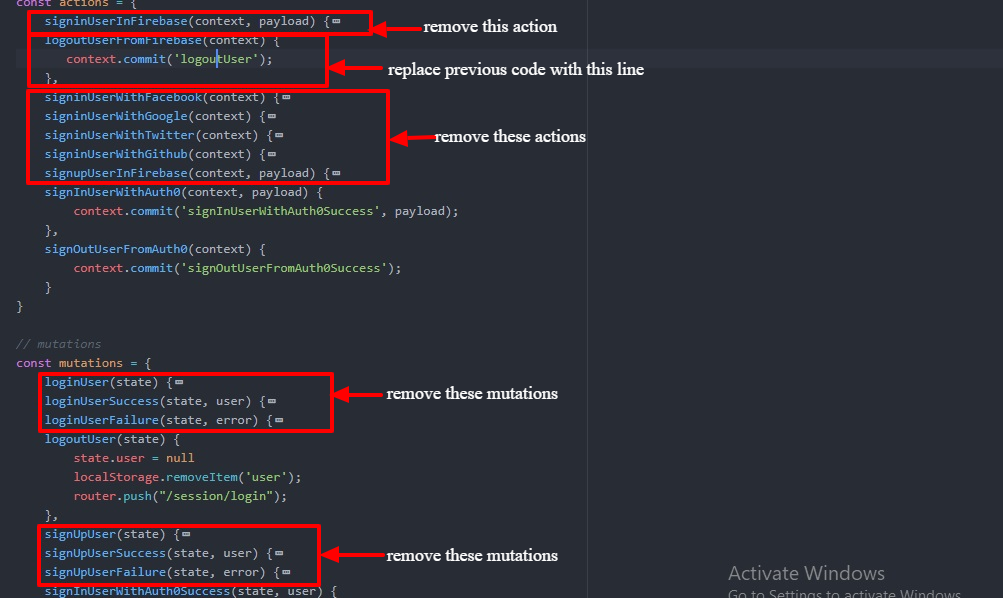
4). Go to src -> store -> modules -> auth -> index.js and remove below lines of code as mentioned in screenshots.
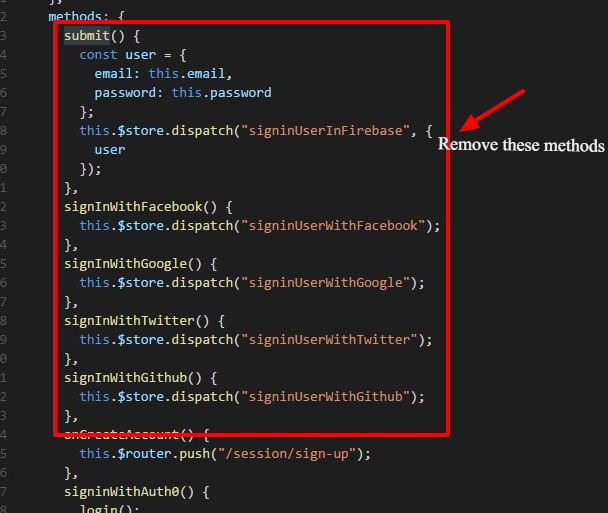
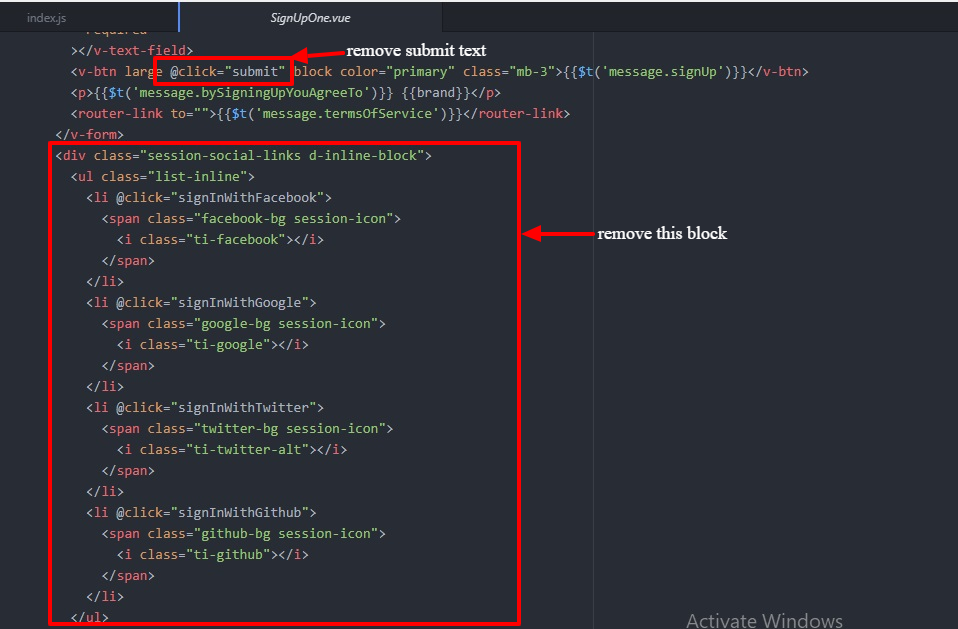
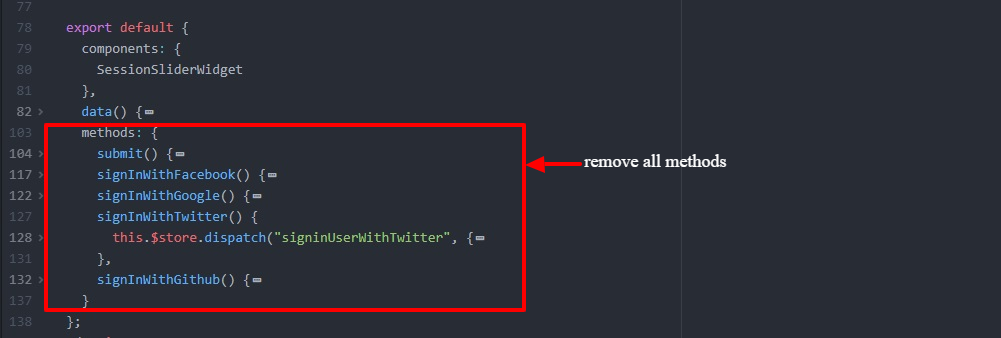
5). Go to src -> views -> session , open the SignUpOne.vue file and remove all methods for firebase login authentication.
6). Also run "npm uninstall --save firebase" to uninstall the package from the dependencies.
This template is build with scss?
Yes, this template uses scss variables, mixins and proper structure of the scss so as to provide you the full control over the styling. Using scss variables, you can customize the whole template as much as you can. Please check the src->assets->scss folder in the template to have an inside look of the scss variables used in the template
Integrate the template with NUXT, Is it possible?
Yes, it is possible to integrate NUXT with Vuely. Here is step by step instructions to integrate:
- Install vue-cli by running npm install -g vue-cli
- Now run this “vue init vuetifyjs/nuxt my-project” it will create your project files.
- Now you can copy Vuely Stores and Components from Vue.js project to the corresponding Nuxt folders.
- For routing, you have to recreate each route in Pages folder.
- Afterwards, for each Page you have to rethink and refactor your loading and data strategy (asyncData() instead of data()).
- To get more information about Nuxt, Please read the official document.
How to connect to others databases? Like MongoDb, Mysql.
Vuely comes with Api through which you can connect your database like mongoDb, mysql etc with this template. Here is step by step instructions to connect your database server with this template:-
- You must have a backend server.
- Add your backend url under the
src->api->index.jsfile in thebaseURLkey.
import axios from 'axios';
export default
   axios.create({
      baseURL: 'https://vuely.theironnetwork.org/data/',
      timeout: 1000
   });
How to integrate Vuely with Laravel?
Note: You need to open the vuely, vuely-laravel(package that we provide) and your laravel project. By default vue is present in your freshly created laravel project, as you can see in package.json file .
Step 1: Open terminal and go to your project directory and run the following commands:
npm install //create node-module folder
npm run dev //compile everything
Step 2: Open the Laravel’s webpack.mix.js and replace the content with the following code
let mix = require('laravel-mix');
  mix.autoload({
    'jquery': ['$', 'window.jQuery', 'jQuery'],
})

mix.webpackConfig({
    resolve: {
        alias: {
            'Api': path.resolve(__dirname, 'resources/js/api/'),
            'Components': path.resolve(__dirname, 'resources/js/components/'),
            'Constants': path.resolve(__dirname, 'resources/js/constants/'),
            'Container': path.resolve(__dirname, 'resources/js/container/'),
            'Views': path.resolve(__dirname, 'resources/js/views/'),
            'Helpers': path.resolve(__dirname, 'resources/js/helpers/'),
            'Themes': path.resolve(__dirname, 'resources/js/themes/')
        }
    },
    output: {
        chunkFilename: mix.inProduction() ? "js/prod/chunks/[name]?id=[chunkhash].js" : "js/dev/chunks/[name].js"
    }
});

mix.js("resources/js/main.js", "public/js")
   .sass("resources/js/assets/scss/_style.scss", "public/css/style.css");
Content of mix.autoload and mix.webpackConfig is added here from vuely’s vue.config.js .
Step 3: Open the vuely-laravel project that we have given to you and copy the content of package.json and paste it in your Laravel’s project package.json.
Step 4: Create a file .babelrc in your project directory (projectName/.babelrc) and put the following code in the file:
{
   "plugins": ["syntax-dynamic-import"]
}
Step 5: Go to your project’s route/web.php and replace the route with the following code:
Route::get('{any}', function () { return view('welcome'); })->where('any','.*');
Step 6: Go to your laravel project in resources/js and remove app.js file . Then open the vuely/src and copy all the folders and files and paste it inside your laravel’s project resources/js.
Step 7: Replace the code of your laravel’s resource/views/welcome.blade.php with the vuely’s public/index.html and after that, update the welcome.blade.php file by adding the following line in your head tag:
Replace the link tag with rel="icon" with the following line:
<link rel="shortcut icon" type="image/png" href="{{asset('favicon.png')}}" />
and your body should looks like this:
<body>
   <div id="app"></div>
   <script type="text/javascript" src="{{asset('js/main.js')}}"></script>
</body>
Step 8: Copy the static folder and favicon from vuely’s public folder and paste it inside your laravel’s project public folder.
Step 9: In your laravel’s project public/js remove this app.js and remove the css folder from the public directory of your laravel project.
Step 10: Now, Go toresources->js->lib and remove VuelyCss.js file. Now open main.js file and remove following import file.
import './lib/VuelyCss'
Step 11: Go toresources->js->assets->scss and create _vendor.scss file and add the following content in it.
/* ======= All App File Include Here ======= */
// Vuetify Css
@import '~vuetify/dist/vuetify.css';

// Editor Css
@import '~vue-wysiwyg/dist/vueWysiwyg.css';
@import '~quill/dist/quill.core.css';
@import '~quill/dist/quill.snow.css';
@import '~quill/dist/quill.bubble.css';

@import '~vue-tour/dist/vue-tour.css';

// Drag And Drop Css
@import '~vue2-dragula/styles/dragula.css';

// nprogress
@import '~nprogress/nprogress.css';

// Icon Files
@import '~weather-icons/css/weather-icons.min.css';
@import '~../themify-icons/themify-icons.css';

// leaflet map css
@import '~leaflet/dist/leaflet.css';

// Slick Slider
@import "~slick-carousel/slick/slick.css";
@import "~slick-carousel/slick/slick-theme.css";

// animate css
@import '~../animate.css';

// Video Player CSS
@import '~video.js/dist/video-js.css';
@import '~vue-video-player/src/custom-theme.css';

// Image Croppa CSS
@import '~vue-croppa/dist/vue-croppa.css';

// CryptoIcons CSS
@import '~../webfont/cryptocoins.css';
Step 12: Now import this _vendor.scss file into style.scss file.
Step 13: Now, run the following command:
npm install //To download the dependencies
If you want to run the project in development mode, then run this command:
npm run dev //compile everything in devlopment mode
If you want to run the project in production mode, then run this command:
npm run prod //compile everything in production mode
In the last, serve your project with the following command:
php artisan serve
